

Making your own vanilla paste at home is not only simple but also rewarding. This guide walks you through everything from understanding what vanilla paste is, to selecting the right ingredients and tools, and finally creating it in just three straightforward steps. You’ll also find tips, troubleshooting advice, and creative uses for your homemade vanilla paste. By the end, you’ll have the confidence to whip up this aromatic staple anytime you need it!
Table of contents
Understanding Vanilla Paste
What Is Vanilla Paste?
If you’ve ever wondered what makes vanilla paste so special, here’s the scoop: it’s a thick, concentrated mixture of vanilla bean seeds, sweeteners, and a binding agent like gum or syrup. Unlike vanilla extract, which is a liquid, or vanilla beans, which can be fiddly to use, vanilla paste offers the best of both worlds. You get the rich, robust flavor of real vanilla beans without the hassle of scraping or measuring each time you bake.
What makes it stand out? The little black flecks of vanilla seeds add an extra visual appeal to your desserts, giving them a more gourmet touch. Whether you’re whipping up custards, cakes, or even savory sauces, vanilla paste can elevate your recipes to the next level of flavor.
Why Make Homemade Vanilla Paste?
Let’s be honest—store-bought vanilla paste can cost a pretty penny. Making it yourself not only saves you money but also ensures you know exactly what’s going into it. No artificial additives, preservatives, or hidden sugars—just pure, delicious flavor.
Homemade vanilla paste is incredibly versatile, too. You can tailor it to suit your preferences, whether that means opting for a sugar-free version or choosing your favorite type of vanilla bean. Plus, it’s a fun and satisfying project that leaves your kitchen smelling heavenly!
With these benefits in mind, it’s no surprise that more and more people are swapping their store-bought jars for homemade ones. By making it yourself, you’ll always have a fresh supply on hand for your next baking adventure. So, let’s dive into the next steps and see how it’s done!
Ingredients Needed to Make Vanilla Paste
Essential Ingredients
To create homemade vanilla paste in three easy steps, you’ll need just a handful of ingredients. At the heart of it all are vanilla beans, the star of the show. Their rich, aromatic seeds are what give vanilla paste its signature flavor. You’ll also need a sweetener, like sugar, honey, or agave syrup, to balance the taste and act as a preservative. Lastly, a binding agent—such as food-grade glycerin or a small amount of corn syrup—helps create the smooth, spreadable consistency we all love.
If you’re looking for variations, there are plenty of options. For example, you can use maple syrup for a unique twist or opt for a sugar-free alternative like stevia if you’re cutting back on sugar. Each choice subtly affects the flavor, so don’t hesitate to experiment!
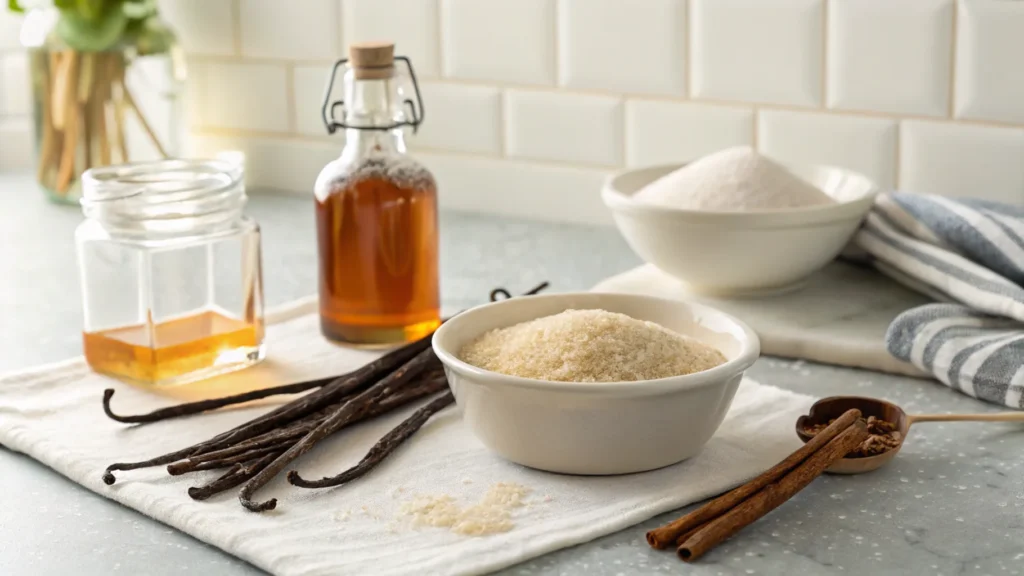
Choosing the Right Vanilla Beans
The type of vanilla bean you choose plays a big role in the final taste of your paste. Madagascar vanilla beans are known for their classic, rich, and creamy profile, making them a popular choice. Tahitian vanilla beans, on the other hand, are floral and fruity, while Mexican beans bring a bold, smoky note to the mix.
When selecting beans, look for ones that are plump, moist, and aromatic. Avoid beans that are brittle or overly dry—they won’t yield as much flavor. If possible, buy whole vanilla beans in bulk to save on costs and ensure you always have fresh ingredients at hand.
Equipment Required for Vanilla Paste Preparation
Basic Kitchen Tools
The best part about making homemade vanilla paste is that you don’t need fancy gadgets. A sharp knife is essential for splitting the vanilla beans and scraping out the seeds. You’ll also need a small bowl for mixing and a blender or food processor to achieve a smooth, uniform texture.
Once your paste is ready, you’ll want an airtight jar or container for storage. Glass jars work best because they help preserve the flavor and look elegant on your pantry shelf. Make sure it’s clean and dry before transferring your paste.
Optional Equipment for Efficiency
If you’re planning to make large batches of vanilla paste, a few extra tools can come in handy. A fine mesh strainer or cheesecloth helps if you prefer a smoother paste without bits of bean pod. Similarly, a digital scale ensures precise measurements of ingredients, especially if you’re following a sugar-free recipe or adjusting ratios.
By now, you should have all the tools and ingredients ready. In the next part, we’ll walk you through how to make homemade vanilla paste in three easy steps—it’s simpler than you might think!
Step-by-Step Process to Make Vanilla Paste
Step 1: Preparing the Vanilla Beans
The first step in how to make homemade vanilla paste in three easy steps is all about the beans. Begin by splitting your vanilla beans lengthwise using a sharp knife. Hold the bean steady and carefully cut down the middle to reveal the tiny seeds inside—also known as “vanilla caviar.” Scrape the seeds out gently with the back of your knife, making sure to collect every bit of that fragrant goodness.
Don’t discard the pods just yet! They still contain a ton of flavor. You can add them to your paste for a stronger vanilla taste or save them for another use, like infusing sugar or making vanilla extract.
Step 2: Mixing Ingredients
Now comes the fun part—mixing everything together! Combine your scraped vanilla seeds, a sweetener of your choice (like honey or sugar), and your binding agent in a blender or food processor. Blend the mixture until it reaches a smooth, spreadable consistency.
If you prefer a finer texture, consider straining the mixture through a fine mesh sieve or cheesecloth to remove any remaining bits of pod. Taste as you go and adjust the sweetness or consistency to your liking. Keep in mind that a little vanilla goes a long way, so don’t be tempted to overdo it.
Step 3: Storing the Vanilla Paste
Proper storage is key to keeping your homemade vanilla paste fresh and flavorful. Transfer the paste to an airtight jar or container and seal it tightly. Store it in a cool, dark place like your pantry or fridge, where it can last for up to six months.
Always use a clean spoon when scooping out your paste to prevent contamination. And if you notice any changes in smell or texture over time, it’s best to make a fresh batch.
Troubleshooting and Tips for Perfect Vanilla Paste
Common Issues and Fixes
While making vanilla paste is fairly simple, a few hiccups can arise. If your paste turns out too runny, try adding a bit more of your binding agent or allowing the mixture to sit and thicken over time. On the other hand, if it’s too thick, a splash of water or extra sweetener can help loosen it up.
Flavor inconsistencies are another common challenge. To avoid this, use high-quality vanilla beans and measure your ingredients carefully. Remember, the type of bean you choose—Madagascar, Tahitian, or Mexican—will greatly influence the flavor profile.
Enhancing Flavor Profiles
Want to take your paste to the next level? Try experimenting with add-ins like cinnamon, nutmeg, or even a pinch of sea salt. These can add complexity and depth, making your homemade vanilla paste even more versatile in the kitchen.
For more delicious ideas and tips, you might enjoy checking out this easy vanilla cake recipe—a perfect match for your homemade paste!
Recipes Using Homemade Vanilla Paste
Delicious Applications
Now that you’ve mastered how to make homemade vanilla paste in three easy steps, it’s time to put it to good use. This versatile ingredient shines in countless recipes, from desserts to beverages and beyond. Stir it into cake batter or cookie dough to create baked goods bursting with rich, aromatic flavor. Swirl a teaspoon into your morning coffee or tea for a comforting vanilla kick. You can even use it to enhance frostings, puddings, or custards—the options are endless!
For those who enjoy savory dishes, vanilla paste can add a surprising depth to marinades and sauces. Try using it in a glaze for roasted vegetables or as a subtle flavor booster in seafood recipes.
Creative Ideas
Think outside the box and experiment with unique uses for your homemade paste. For example, mix it into whipped cream or yogurt for an easy, luxurious topping. It also pairs beautifully with tropical fruits like mango and pineapple or works as a star ingredient in DIY gifts like vanilla sugar or homemade ice cream.
If you’re craving a sweet treat to pair with your paste, consider checking out this recipe for carrot cake cupcakes. The moist, spiced flavor is a perfect canvas for your delicious vanilla creation!
Frequently Asked Questions
How is Vanilla Paste Made?
Vanilla paste is made by combining the seeds of vanilla beans (or “vanilla caviar”) with a sweetener and a binding agent to create a thick, spreadable consistency. The process typically involves splitting vanilla beans to scrape out the seeds, blending the seeds with ingredients like sugar or honey, and sometimes adding a small amount of liquid or extract. The mixture is then stored in an airtight container to retain its freshness and flavor.
What is a Substitute for Vanilla Paste?
If you don’t have vanilla paste on hand, you can substitute it with either vanilla extract or a whole vanilla bean. Use an equal amount of vanilla extract for a similar flavor, though it won’t provide the speckled appearance of vanilla seeds. Alternatively, scrape the seeds from a vanilla bean and mix them with a bit of sugar or syrup for a closer substitute.
What is the Difference Between Vanilla Extract and Vanilla Paste?
Vanilla extract is a liquid made by steeping vanilla beans in alcohol and water, offering a strong but uniform vanilla flavor. Vanilla paste, on the other hand, is thicker and contains visible vanilla seeds, giving it a richer, more intense flavor and a gourmet look. While extract is ideal for blending into liquids, paste works well for recipes where a concentrated flavor or visual appeal is desired.
How Long Will Vanilla Paste Last?
When stored properly in an airtight container and kept in a cool, dark place, homemade vanilla paste can last up to six months. For longer shelf life, you can refrigerate it, but always use a clean spoon to avoid contamination and preserve its quality.
Now that you’re armed with knowledge, it’s time to enjoy your homemade vanilla paste. For more culinary inspiration, explore other delicious recipes on our site. Happy cooking!
Creative Variations for Vanilla Paste
Exploring Flavor Twists
Now that you’ve mastered how to make homemade vanilla paste in three easy steps, why not give it your own creative spin? One way to switch things up is by infusing additional flavors into your paste. For a warm, spiced touch, add a pinch of cinnamon or nutmeg to the mix. Prefer something fruity? Try blending in a hint of citrus zest like orange or lemon for a zippy contrast to the sweet vanilla flavor.
Another idea is to use different sweeteners, such as maple syrup or agave, to craft unique variations. These not only alter the taste but can also complement specific recipes beautifully, giving your desserts a personalized flair.
Fun Applications for Flavored Paste
Your custom vanilla paste can enhance everything from cakes to beverages. Imagine a cinnamon-spiced vanilla paste stirred into oatmeal or a zesty version used to elevate a lemon tart. The possibilities are as endless as your imagination. Plus, these variations make for thoughtful, homemade gifts when packaged in small jars with handwritten labels.
Wrapping Up Your Vanilla Paste Journey
Why Homemade is Always Better
By learning how to make homemade vanilla paste in three easy steps, you’ve not only saved money but also created a product tailored to your taste. The ability to control the ingredients ensures a pure, flavorful paste free from preservatives or unnecessary additives. Plus, making it yourself adds a personal touch to every dish you prepare.
Ready for the Next Adventure?
Now that your pantry is stocked with this versatile ingredient, you’re ready to explore an array of culinary creations. Whether you’re baking cookies, whipping up a decadent frosting, or crafting unique savory dishes, your homemade vanilla paste will be your secret weapon. For more recipes to try, don’t miss out on our easy vanilla cake guide, where your paste can truly shine.
With just a little effort, you’ve unlocked the full potential of one of the kitchen’s most beloved flavors. Happy cooking!